You can do wonderful things with your Unity editor via scripting. For instance, you can write a script to populate your scene with random objects. All you need is a method of executing those scripts. Let’s talk about how to put your scripts into any menu.
For this purpose, we will use MenuItem annotation and write a script that will count number of objects on our scene.
using UnityEditor;
using UnityEngine;

public class CountSceneObjects {

    [MenuItem("Tools/Count Scene Objects")]
    public static void Execute()
    {
        int count = FindObjectsOfType<Transform>().Length;
        EditorUtility.DisplayDialog(
            "Count Scene Objects",
            "There are " + count + " objects on your scene!",
            "OK");
    }
}
Let’s see what you can find in this script.
- In the line 1 we’re adding a using to UnityEditor namespace. This allows us to use any UnityEditor class (like MenuItem or EditorUtility in this example).
- Have you noticed that in the line 4 our class is not inhering MonoBehaviour class? That’s because our class is not meant to be any type of component.
- In the line 6 there’s a MenuItem annotation with Tools/Count Scene Objects as argument. This argument is the menu position of our script.
- Executed method (line 7) must be public and static.
- In the line 9 we can find all Transform objects on the scene knowing that every object contains exactly one Transform component.
- In the line 10 we’re using editor method to display the information dialog.
OK let’s test it. First thing that you will notice when this script is added to your project, is that you will find new menu entry.
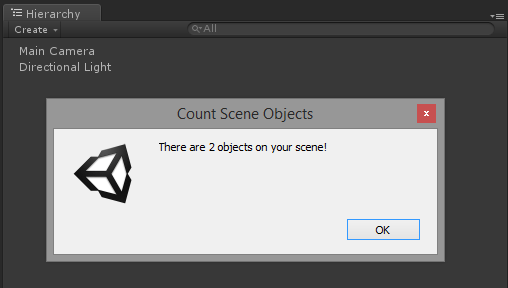
And after clicking on it…
Looks like it works as expected!
Not only in the main menu
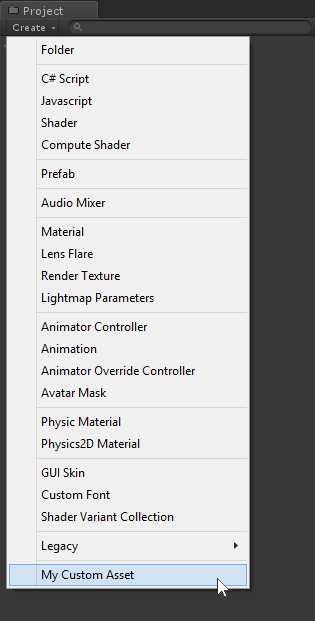
The main menu is not the only place when you can put your items. For instance, if you would like to place a custom entry under the Project’s Create button, you can write your code like this:
    [MenuItem("Assets/Create/My Custom Asset")]
    public static void CreateAsset()
    {
        EditorUtility.DisplayDialog(
            "Create Custom Asset",
            "This will create custom asset!",
            "OK");
    }
Also you can add a menu entry to the Hierarchy’s Create menu:
    [MenuItem("GameObject/My Custom GameObject", false, 21)]
    public static void CreateGameObject() {
        EditorUtility.DisplayDialog(
            "Create Custom GameObject",
            "This will create custom GameObject!",
            "OK");
    }
Please note that in line 1 we need to set priority to make our menu entry to be placed in the first GameObject menu group, or it won’t be displayed in the Create menu. For Unity 5.1.2, the priority of 21 is the maximum allowed priority for an item to exist still in the first group.
For more examples, please see the MainMenu documentation.
Notice about placing editor scripts
Please be aware that when your script is using any of the UnityEditor classes, it should be excluded from the target build. Otherwise, your build will simply fail. Unity allows you to easily exclude these files simply by putting them in the Editor directory (it can be nested within any other sub-directory).
Also you won’t be allowed to call editor scripts from regular game scripts.
Unitypackage file
The example scripts can be downloaded as unitypackage file from here. Just unpack it into your project to try it for yourself.
